RIZWANA
ALI
HOW-TO GUIDE:
LIGHTING-
In order to use flash to mimic the look of sunlight the first thing you should do is shoot in the shade in order to be in full control of the light, then that’s when you use the flash to add light. To do this you can need to use the flash with another piece of equipment such as the wide angle diffuser, a beauty dish or a rectangular shaped softbox.
To create flattering light on your subject you should place your light source above your subject as all light sources are usually above us such as the sun and street lights. The light source shouldn’t be placed directly above but should have some distance between the subjects in order to create soft light. Place the flash behind you, above you and facing down towards the subject.
To illuminate a person’s eyes in a photograph when using a natural light you should make sure that the subject doesn’t look directly into the sun or find a reflective surface that bounces light back into the persons face. When using a flash in the hot shoe (mounting point on top of a camera to attach a flash unit) make sure to bounce the flash output off of a surface to the side and slightly behind you and have the subject face you directly. Make sure to not flash off the ceiling as it will create shadows under the eyes. When using the flash out of the hot show put the flash in a large modifier. Make sure that the light modifier is bigger than the subject. Place the light modifier with the flash in front or to the side of the subject.


POSING-
When taking photos of your subject seated make sure that they are not sitting on the thighs this is because when sitting down the weight is being put on the thighs which can make them look unflattering in the pictures. When doing this you can make sure subject is sitting near the front of wherever they are sitting and then depending on their clothing and body type have them either lean forward to the camera or lean back in order to make them more comfortable and look presentable.
Another thing to consider is their arms. Make them do something with their arms as arms and hands are a big part of the picture. This is a big part due to body language and people generally using their hands to express so when considering the arms you can make you’re subject cross their arms or hold a pose or even bring in a prop.
You need to see whether they are sitting naturally. To get the subject looking more comfortable you can position them how you want and guide them in order to look natural or you can give the person a mental situation to be in to give them a setting to look more natural as everyone’s seating position would be different in various situations such as just watching television or being in a classroom, in each situation you would be sitting in a different way.
The last thing to consider is the lighting. If natural light is not being used for the shoot then using a large modifier put it above and slightly to the side to give a more flattering light in the scene.

Step by step on how to pose someone:
-
Have them stand straight at you
Before having the model pose you should do this as everyone’s different and this is the time to carefully observe them and how they will look on camera.
-
Observe their higher shoulder
The model should have their backs straight in order to have a straight posture.
-
Show them the pose
It’s easier to show the models the pose as most people are visual learners or you could go and position them yourself and guide them on how to keep their posture.
COMPOSITION-
Composition is the way various elements in a scene are arranged within a frame.
When composing portrait images you should focus on the eyes and that it should be in the upper third area of the image because of the natural way that it draws a viewer in and lets them explore the rest of the image.
Here are some composition techniques:
-
Rule of thirds
This is used to place the important elements of the scene alone one or more of the lines or where the line intersects. You are not meant to place the subject right in the middle of the screen.
-
Centred composition and symmetry
There are times where placing the subject right in the centre if the frame works well and created a symmetrical scene.
-
Frame within the frame
This is an effective way of portraying depth in a scene. You should look for elements such as windows and arches to frame the scene with and it doesn’t have to surround the entire scene in order to be effective.
-
Leading lines
This helps the viewer through the image and focus attention on important elements. Paths, walls or patterns can all be used as leading lines. Leading lines don’t have to be straight lines but can also be curved lines.
-
Diagonals and triangles
Triangles and diagonals are shown to add ‘dynamic tension’ in a photo. As we aren’t used to diagonals in our everyday life it created instability in our minds. For example showing a building leaning at different angles created visual tension as we are used to seeing buildings faced straight up.
-
Patterns and textures
Showing patterns and different textures on manmade objects or natural can create a pleasing composition and can be pleasing to the eye.
-
Fill the frame
To do this make sure that the subject fills the entire frame or leave little space around as this helps the viewer to focus on the main subject without any distractions, it also allowed the viewer to look at the subject in more detail as the photograph is more close up. When filling the entire frame you need to make sure to get close and crop out elements of the subject if needed.
-
Leave negative space
Leaving a lot of space or ‘negative’ space around the subject can be very appealing as it creates simplicity and helps the viewer to focus on the main subject when there is a lot of space left which is empty and hasn’t got a lot of elements in the back to distract the viewer.
-
Simplicity and minimalism
In order to do this you need to make sure that there aren’t a lot of elements in the background and that it’s not too complicated, you can also zoom in on part of the subject and focus on a specific detail so that the viewer isn’t distracted from the subject.
-
Isolate the subject
Use a shallow depth of filed in order to do this. By using a wide aperture you can blur the background to only keep the subject in focus.
-
Change your point of view
Getting really low or high can create a more interesting composition. To get the perfect shot it is key to move your body around in order to get various different viewpoints of one element.
-
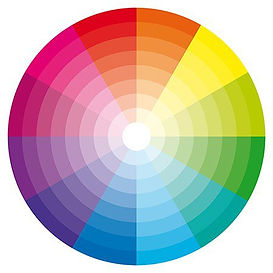
Look for particular colour combinations
Certain colour combinations complement each other well and this is something which is to think about when it comes to fashion and other types of photography as the colour takes a main part in each shot.
-
Rule of space
This is the direction at which the subjects in the photo is facing or moving towards. There should be space left in front of where the subject is moving towards rather than behind it.
-
Balance elements in the frame
To do this you should compose your shot to include a secondary subject which isn’t the main subject of the photograph and size it on the other side of the frame without taking a lot of focus off the main subject.
-
Juxtaposition
This is when two or more elements in the frame contrast with each other or complement each other. This helps play an important part in telling a story from the photo and to have an intention.


DOROTHEA LANGE

Dorothea Lange was born on May 26th, 1895, in Hoboken, New Jersey. Heinrich Nutzhorn, her father, was a lawyer and her mother, Johanna, stayed at home to raise Dorothea and her brother, Martin. At birth Dorothea’s name was actually Dorothea Nutzhorn but later on she changed her surname to her mother’s maiden name, Lange, as her parents got divorced and she blamed it on her father. Dorothea Lange was an American documentary photographer and journalist who was known for documenting the Depression Era. She is known for photographing victims of the Great Depression and showed the faces and emotions of so many of the people who were affected which is why she was very important in the development of documentary photography. Dorothea used to photograph unemployed men who used to wonder the streets and she used to photograph migrant workers with captions from the workers themselves during the Great Depression. Art and literature were big parts of Lange’s upbringing. She had never really taken any interest in academics but decided to pursue photography as a profession. She studied the art form in Columbia University and had worked for several different photographers. By 1918, Lange was living in San Francisco and soon running a successful portrait studio. With her husband, muralist Maynard Dixon, she had two sons and settled into the comfortable middle-class life she’d known as a child.
Dorothea Lange first started documentary photography in the 1920's when she travelled around the Southwest with her husband where she mostly photographed Native Americans. During the Great Depression in the 1930's she trained her camera to see what she did in her neighbourhood.
In the early 1930's Dorothea was in an unhappy marriage and left her husband to be with Paul Taylor who was a university professor and labour economist. They travelled together and documented the hardship that was going on during the Great Depression. Paul wrote reports and Dorothea took photographs of people they met to show the hardship and pain that Americans were experiencing.


Dorothea Lange photographed during the Great Depression for the US Farm Security Administration (FSA) so that they could investigate the living conditions of farm workers and their families in places such as California. The US Agriculture Department hoped that Lange’s powerful images would bring the conditions of the rural poor to the public’s attention.
Dorothea Lange hoped that her documenting what was going on at the time would provoke society to correct the injustices however that didn’t always happen. Her photography was however influenced to generations of documentary photographers. She was able to photograph unemployed men who wandered the streets of San Francisco and showed the desperate conditions that they were in which received immediate recognition from the public and from other photographer when publicly exhibited.
MARTIN SCHOELLER

Martin Schoeller was born on the 12th of March, 1968. He was born in Munich, Germany. He is a freelance photographer who is known for his portraits of celebrities and ordinary people. Martin Schoeller studied photography in Berlin and worked as a photographer before moving to the United States in 1993 where he stayed in New York and worked as an assistant to Annie Leibovitz for three years before deciding to become a freelance photographer in 1996.
As he grew up in Germany he was influenced by August Sanders portraits of the poor and the working class. With his photography he takes close ups of everyone to show celebrities and ordinary people to be in the same level and to challenge the viewers notion of celebrity, value and honesty.

Martin Schoeller is famous for taking tightly framed photographs of everyone. His way of approach allows him to get to the heart of his subjects. He is an award winning photographer renowned for extreme close up portraits.
In the 2000’s, Martin Schoeller moved onto publishing books of photography and his first book of portraits was “Close-Up: Portraits 1998-2005”.

As a freelance photographer he produces portraits of people he meets on the streets.
His most recognised works are his portraits which are shot with similar lighting, backdrops and tone.
DIY WEEK
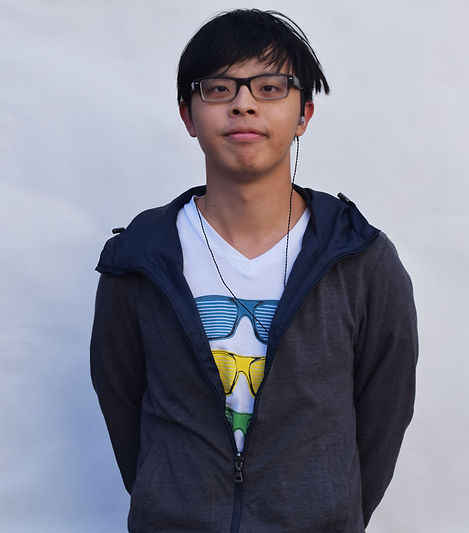
For the DIY week I created a light modifier. I used a pringles can and cut out the bottom part of the shape of the flash gun so that I could put it through the hole. However, the hole that was cut out was too small for the flash gun to fit in so we used my group partners light modifier instead which was a shoe box. She had white pieces of paper cut out to fit all of the insides of the shoe box and on the side there was a shape of the flash gun cut out so that the flash would fit in and create a light diffuser.
These are some examples of light modifiers:

For the photoshoot I used a 50mm lens camera, a flash gun and the DIY light modifier.

The first shoot took place inside of college where we found a place with a white background and where there wasn’t good lighting so that the light modifier could be used to its advantage.
The point of the light modifier was to bounce the light off of the white walls and onto the model.


When using the flash gun we had lots of problems as we couldn’t get the flash to connect with the camera. Once we had managed to connect it we had one person hold the flash and light modifier in place while the other person takes the photograph of the model. When taking the pictures we had to get the person holding the flash and light modifier to move around either closer or further away from the model as in some pictures there would be too much light on the model.

Some of these shots had not worked out well as the light modifier was only on one side of the subject so we can see on the model that the flash is only being showed on one side instead of creating a nice effect on the entire model.

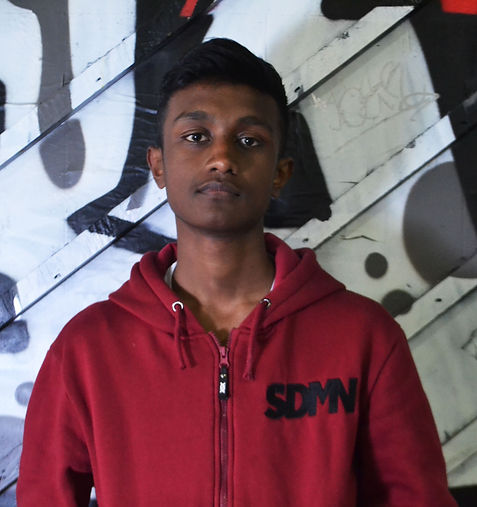
For the next shoot it had to be on location out of college so we went to Shoreditch.

Some problems we faced during the shoot were that went having the model be in front of the walls some natural light came into the tunnel from the other side of the wall and was shining on them so we had to retake the pictures again with all the models and move them aside a bit so that the natural light was not on them.
I went to Shoreditch and had the background to be walls which had graffiti on them in a tunnel and also used the tunnel itself so that the light modifier could be used better due to there being barely any natural light used in the shot.
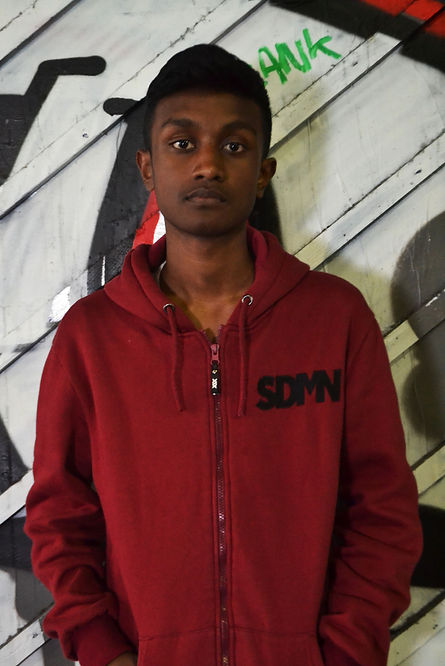


This is one of my favourite pictures as I can see that the light modifier worked better with the model when standing inside the tunnel. We can see that only the subject is in focus and I like how the model is lit up while everything in the background is darker and shows a good contrast between the foreground and background and I also like that you can only see the light that’s coming from outside of the tunnel right behind the subject.
ENVIRONMENTAL PORTRAITS
ANTHONY KURTZ-

Anthony Kurtz is Swiss-born and is an editorial and art photographer based in Berlin, Germany. He specialises in environmental portraiture and landscape photography, he takes unexpected photographs of people and the spaces they occupy. He uses both natural and studio light to create a mood and atmosphere to tell a story in each photograph that he takes. He documents people and places that are at the edge of society in order to show the physical and mental view, he shows his views all in his photographs and wants to document the ideas of democracy, security and progress in the world.

In all his photographs he manipulates the light, shadow and colour in order to show mystery, sadness, hope and beauty in each photograph. Anthony Kurtz looks up to people who resist oppression and speak up and question things and that is where his work is inspired from.
Anthony Kurtz first started photography as a hobby and had no audience, he documented his generation and showed the way he saw the world but once people started to respond to his photographs that when he realised that he could make a difference.

ENVIRONMENTAL PORTRAIT PHOTOSHOOT-
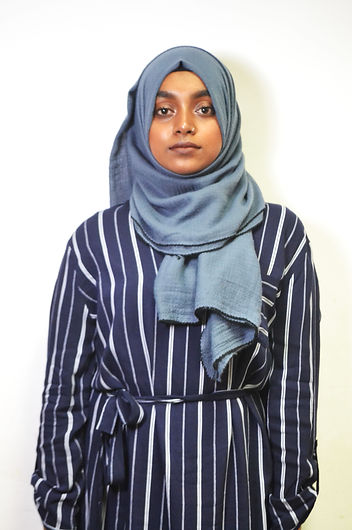
For the environmental portrait shoot I went to Gallions Reach and took photographs of the people that work in the shops both in portrait and landscapes. The aim of this shoot is to show the environment of the people who work in stores and show how their daily life is. When taking the photographs I made sure that the subject is in focus and that a bit of the background is showing so that their work environment is shown within one frame.


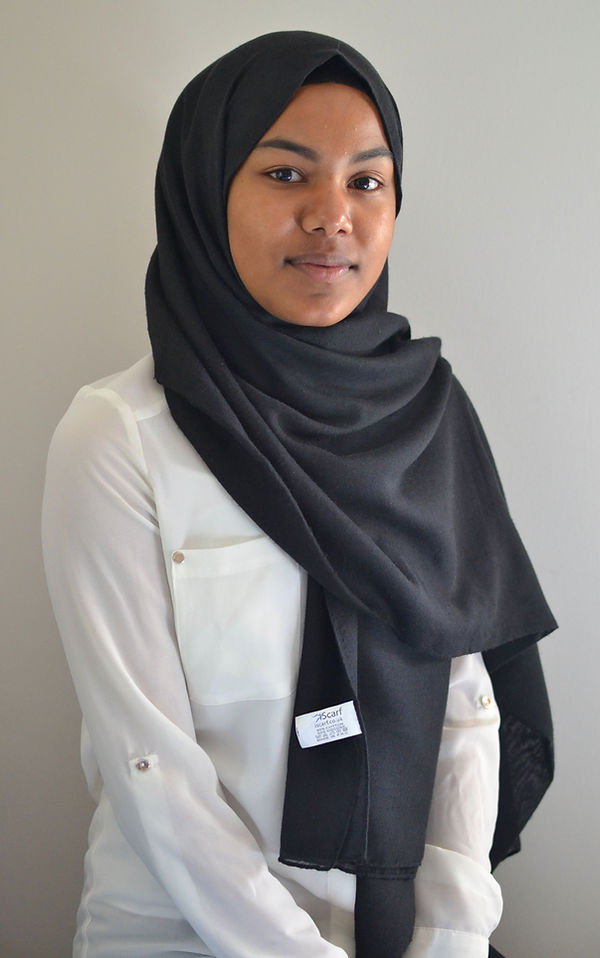
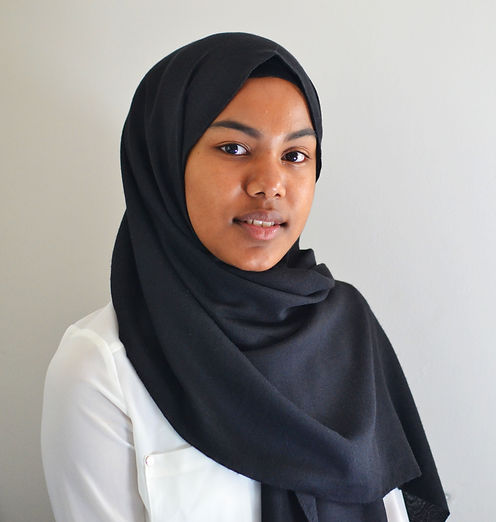
When taking the photographs my aim was to focus on the model and make sure that were is enough space around them in the frame to show their environment. Before taking the photograph I made sure that the model was standing where I want and if they weren’t I asked them if they could move and would guide them to where I want. For example, in the first image the woman in the hijab was working in the perfume section of Boots and was standing behind the till at first and I took a few photographs of her then I asked her to stand in front of where all the perfume were as that shows her actual working environment as she helps customers to purchase perfumes.


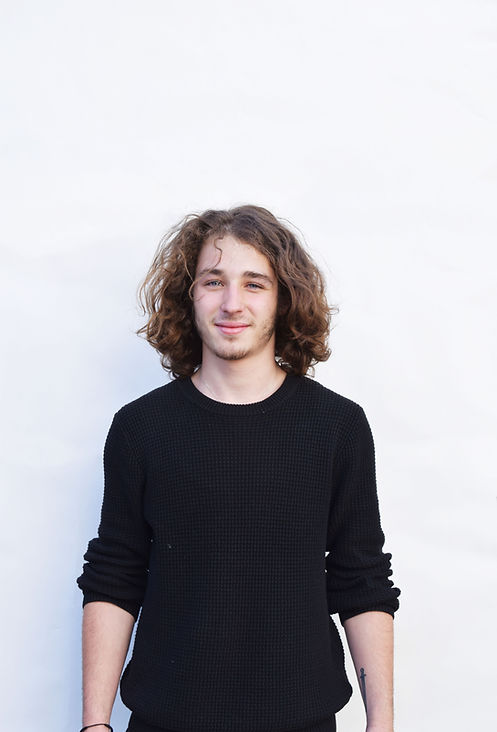
This is one of my favourite pictures from the shoot because in this one frame the customers are being shown as well as the person working in JD. We can see his full uniform and I like the fact that their lanyard is the brightest part of their uniform.

What I like about each image is that you can distinctly tell what the person works as just from their attire and the background that is being shown. I also like the fact that every person that i took a photograph of was smiling or simply just looked proud and pleased to be working where they are.


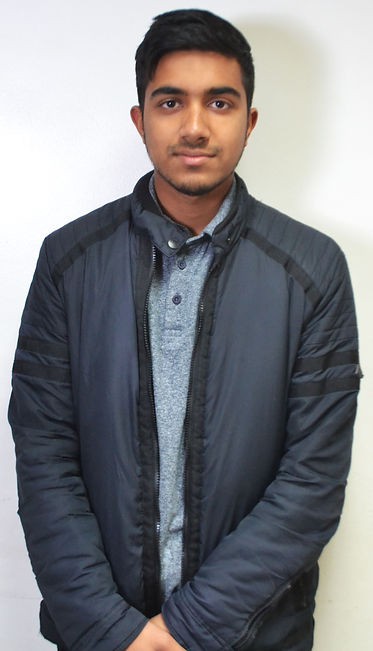
PERFECT HEADSHOTS-
For this photoshoot I had to take portraits so I used a 35mm lens. The aim for this shoot was to use natural and artificial light so I used a flash gun and reflector. I took pictures indoors and outdoors. When indoors I used the reflector and outdoors I just used natural light.
For the photographs taken indoors I used a clear background and used a reflector as there was a lot of light coming in through the window. When using the reflector I placed it close to the window and positioned it carefully so that it was reflecting onto the models face and had someone hold it up in the same position while I took the pictures.
My main objective was the model and taking portraits of them rather than focusing on anything else such as what they’re wearing and how they are posing. For posing I just asked them to look at the camera for the shots I would take.
When taking the images indoors we took the pictures in a bedroom with a clear background and against the wall was the bed so I had the model sit on the bed in order to get portraits of them using that clear background. The problem with this was that the window was beside the wall that we were using and the sun was mainly shining onto the bed or just one side of the model which didn’t look great as I needed light on the entire model and not just one side of their face. So when using the reflector it was quite difficult to get the light to shine on the entire model rather than to just one side of them.

Unfortunately, on some of the photos when using the reflector it didn’t work out as well as it was too bright on one side of the face when I wanted the models face to be evenly lit up. What I also didn’t like was that the shadows of the models features were showing on part of the facing showing that the reflector was on one angle but since the window was on one side and due to needing a clear background I was unable to move the reflector at an angle where it would go in front the models face directly rather than to just one side of the model.

For some of these photos I took away the reflector and used the sunlight only that was coming from outside the window as it created a similar effect from the reflector but much more subtle.


For the images that were taken outside I just used a brick wall, one thing that I found was a problem was that I didn’t take the images straight so it is shown that the bricks are going diagonally. When taking the pictures outdoors I didn’t use any artificial lights and just used the natural light instead.

STUDIO PORTRAITS ON THE STREET-
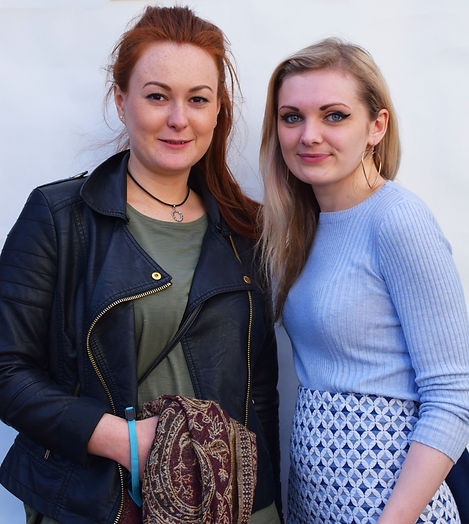
For this photoshoot we had to set up a studio and take photographs of random people in the streets. As it was a studio set up there was a group of 5 of us to help set everything up. The studio that we set up was in Camden and we found a little road past Camden Market so that we aren’t in everyone’s way and so that no one keeps walking past and us having to stop to take picture. On the road there was a wall with graffiti art on it and along that we taped on white pieces of paper in order for it to be an actual studio set up. We stuck up 2 large sheets of paper on top of each other so that people of any height can fit in the background space.
When we set up we used of our group members to check if we are fully able to see them in front of the white background and we realised that at certain heights it wouldn’t work and the lines of the papers overlapping would show near the models heads so we took the group member who was the right height and we walked around Camden checking if peoples heights were similar to his and asked them if they would let us take photographs of them.
One problem about asking people was that they were either foreigners and just couldn’t understand what we were trying to say or they would agree but as soon as we walked them towards the corner or showed them where the studio is set up they would say not having their pictures taken or just walk away because they assumed we would do something to them such as rob them.


When it came to the way each person should pose I let them know to just do whatever they wanted but to look at the camera. In some cases people were looking away and just laughing with whoever they were with, out of awkwardness and in other cases people were smiling a lot and usually people were surprised that I wanted to take a photograph of them and would get really happy.
When taking the photographs, in most of the pictures you could still see lines made by the papers that were overlapped and in some cases the tape and the actual wall was also showing so when editing I used the patch tool to get rid of all the parts of the image I didn’t need in order to make the entire background white.


These were some of my favourite pictures that I took because when I told them to pose however they like, but to just make sure they look into the camera, they still just showed how they are. As you can see on the pictures above the lady is being goofier and funnier and showing how her personality really is and I know that she is actually quite funny because within those few minutes of meeting them two to take pictures, when the other woman was first to take the picture she was joking around with her and saying stuff about her appearance which showed the close relationship they had between themselves also and she was helping to make sure the woman wasn’t feeling awkward and would smile for the camera.

I really like this photograph as I was able to capture her reaction when the person she was with made a comment about her and was laughing about with her.


I also really like how the pictures came out with this woman as when taking photographs of her she would just change how she was posing herself rather than just standing there with one pose the entire time. I liked the fact that she was just taking control of how she would look in each photo taken.
One thing that didn’t really work out for me was that even when needing to take individual pictures of people some people were too nervous to actually just do so and instead just came into pose as a pair even when told that I needed individual photographs of them. As they were really close together as well I couldn’t just edit them out separately and turn it into individual images which was quite frustrating but overall most of the pictures I had taken were of individuals and had turned out well.